
Step 1 Make the pattern for the bodice
Take measurement on your body. You will need to take your bust round, waist round and hip round, Length of the top you need, length of the sleeve.
First fold fabric for the back bodice by the middle and then mark the following dimensions.
Back bodice.
The side flare (S-H) as marked in the pattern is optional.

Front bodice.

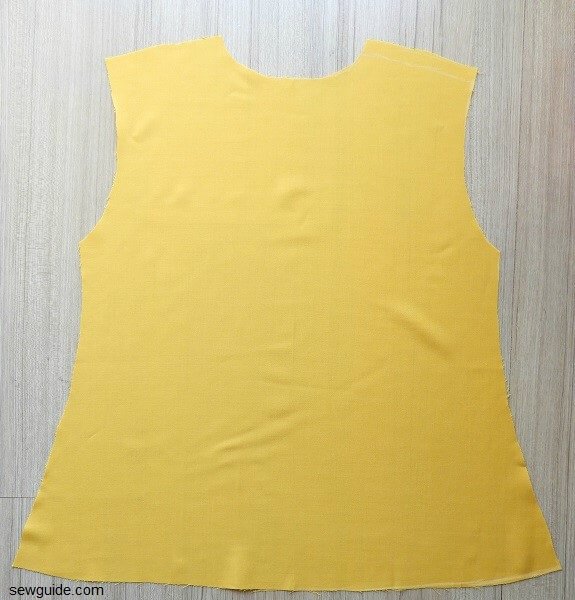
Step 2 Cut out the bodice fabric pattern pieces
You need one back bodice and two front pieces. To cut the back bodice, you should fold the fabric and cut ; To cut the front pieces, keep 2 fabric pieces right sides together and then mark on the top pieces.


Step 3 Cut out the pattern for sleeve
Take two fabric pieces of 17 inch wide and length you need for the sleeve. Keep the pieces right sides together. Mark as in the picture below.

Mark through the markings.

Cut it out.


Open the sleeve. Keep the two fabric pieces the same way- right sides pressing together to the inside. Mark on one side ( this will be the front side of your sleeve) Mark down 1/2 inch from the earlier armhole line

Cut out that side.

Step 4 Hem the sleeve hem
Fold the hem edge twice and stitch in place.

Step 5 Cut out sashes
You need to cut two fabric pieces for the 2 Sashes you need – 5 inch by 32 inch. Fold the fabric piece by half and make a sash.


Step 6 Join shoulder seams
Keep the shoulder seams together, right sides to the inside and join.


Step 7 Bind the neckline and hem
Cut out bias binding tape from extra fabric – you need to bind the neckline and the front flaps and the bottom edges of the front flaps and the back bodice hem.

Cut out 1 inch bias binding tape.

Keep the tape along the edge and sew the binding. Sew with a 1/4 inch seam allowance and then trim the seam allowance. Turn the binding to the other side and fold and stitch in place.

Step 8 Sew the sleeves
Join the sleeve.


Step 9 Join one side seam
You need to join the side seam with one of the flaps as in the picture below.

Clip the seam allowance near the sleeve joint so that there is no puckering on the right side.
Step 10 Join the other side seam
On the other seam you have to insert one of the sashes and then stitch.

Step 11 Sew the sash
Turn the top right side out – one of the flaps is free, not joined to the seam – you have to join the other sash to this flap. Just keep the edges together and stitch
To prevent the neckline from coming open you can attach a snap button to the inside at the v neck that the neckline forms.


For a more accurate fit you may tweak the measurements of shoulder, armhole depth , length of top, as per your body measurements.